1/1/2004
Back on Track...
You can only do so much reading, research so many products, and talk to others about this process. Eventually you have to do it yourself, and find out in a couple of days, if all of the chemicals and products you've assembled will play nice with each other. Last update you saw the ending result of a problem with the PVA. I've now changed my timing of my process, and found that all the chemicals I've gathered do work well, if I let them have the proper time to cure and dry.
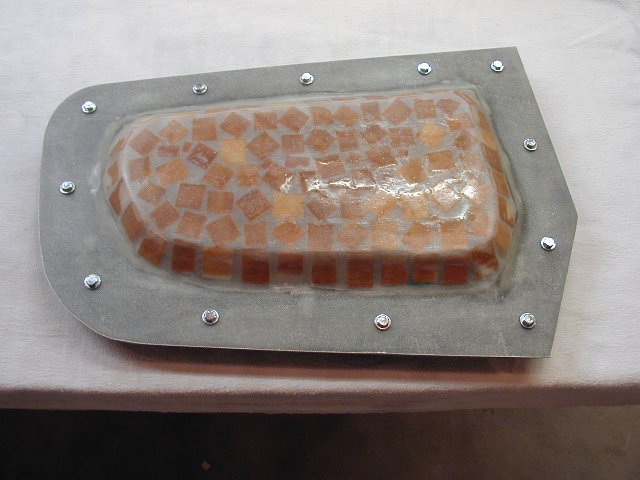
Success can be seen below and I now have my first set of usable molds! 2 years so far, and finally I've got my first molds.
I improved my balsa block idea a bit, and did not put them out on the flange. That makes putting the bolts and wing nuts in, used to clamp the two mold halves together, easy. I can also put them where ever I want. Secondly, it seals the edges easily, so that the molds can be washed, to remove the PVA after use.
It turns out that I, out of paranoia of hurting my original plug, put on my PVA a bit heavy, which means it takes a couple hours to fully dry out. For now, my process will be, for example, shoot PVA before work, say on a Friday morning. Shoot my Duratec primer after work that Friday night. Then be able to get up Saturday and lay up the mold(s). The molds you see below, of the outboard elevators, have 14 layers of resin and cloth out on the flange, and 8 layers in the middle (4 below the blocks and 4 above), so you need a full day set aside to get that many layers down properly.
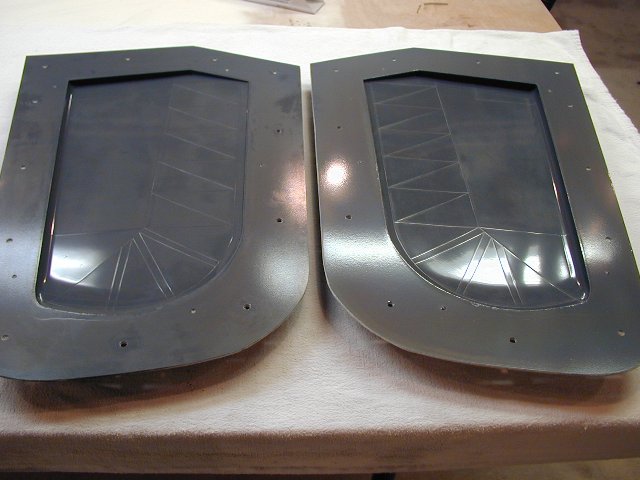
Now that I'm getting the process down, I'll try doing more parts at once. Next will be building the molds for both wing tips at the same time.
Head back to the Main Page