
12/16/2005
Fuse Plug Done !!
Boy have I been wanting to say that for a long time. That time is finally here. This update, while in concept may not seem like a big step from the last time, has taken a lot of work. I've many pictures for you this time, to show you how much work I'm talking about here.
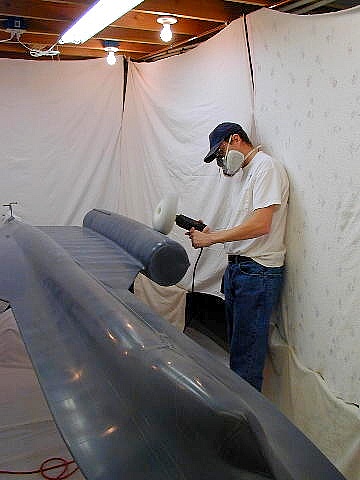
As I've said before, the Duratec primer I'm using is unique stuff. It's a high density mold primer, that can be taken through all the stages of sanding and finishing. The catch to this is that it's a very hard primer, that takes quite a bit of elbow grease to sand. As you see here, my elbow finally gave out and I resorted to power tools. It saved a ton of time, but the trade off, was that it really churned out the dust.
Here you can see, the combination of palm sander and hand sanding with 220 grit sanding screens. You can just start to see the top of the blue tape that was used for the corrugations. Also you can see some of the panel lines have been worked up already as well.

Another wider shot. The trick is, you need to sand down deep enough to get the tape out, but not too far, or you loose the depth of the lines you're trying to make.
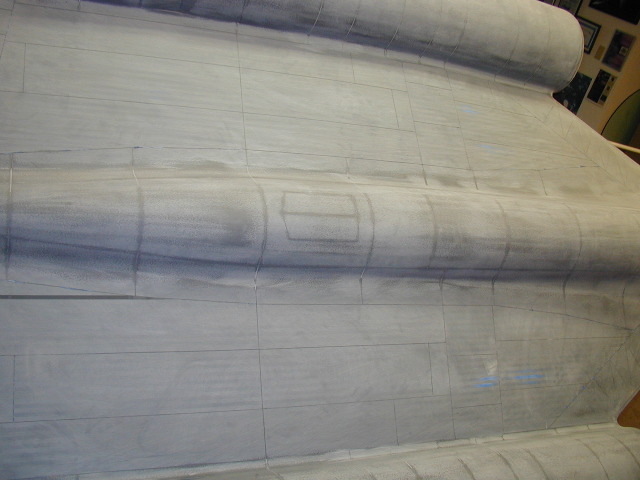
This next part is about as much fun as unwrapping Christmas presents. It went fast, but talk about a mess... Bits of paint chips everywhere. But, all of it came up perfectly and delivered clean, crisp corrugations.
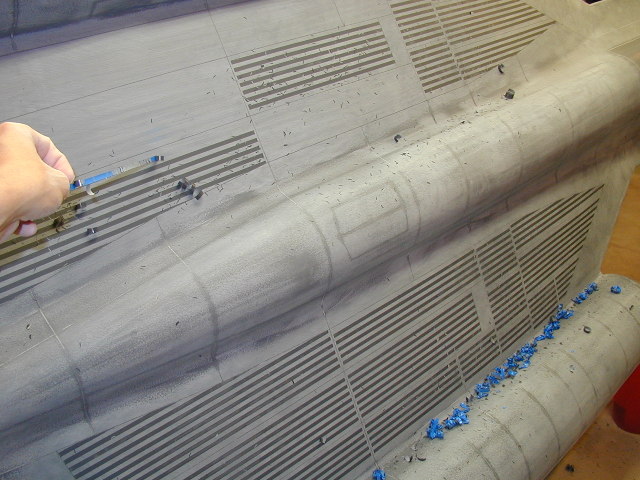
OK, further along now. 220 sanding done. 400 grit sanding done. 600 grit sanding done. Notice that as these progress, we're going from lighter to darker, as the sanding scratches from pervious sanding sessions get sanded out. At this point we cheered. SANDING WAS DONE !! I then took the next 3 weeks off from the plane and totally cleaned the shop...every shelf, every item, all of it. The amount of crud and sanding dust that had accumulated in every corner of the shop over the last year of sanding was scary.
Now to the hospital ward. Well, at least it looks like it. At this stage, the panel lines and corrugations have been cleaned out with acetone, as the 1/32 inch chart tape I use, leaves behind this gummy residue. What is being prepped for here is buffing. Since this slings water and buffing compound everywhere, I wanted to minimize the carnage to the rest of the shop.
It took us 4 hours, but in one session the entire plane gets buffed with 1000 grit buffing compound. I also found out that a Black and Decker drill, spinning a 12 inch buffing wheel lasts 3 hours before going kaput.... "Hmm... What's that electrical burning smell??....."
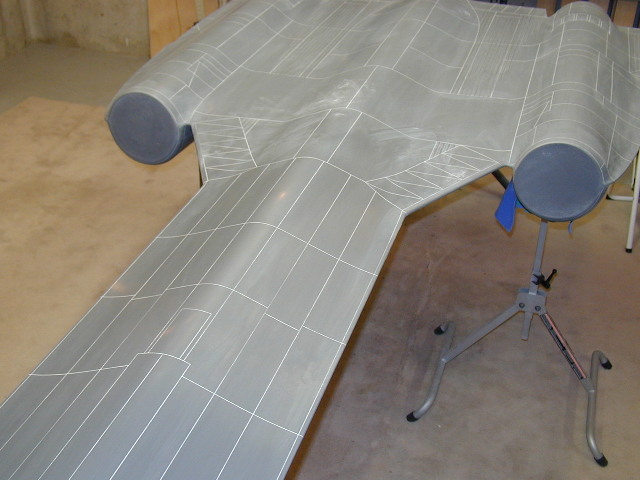
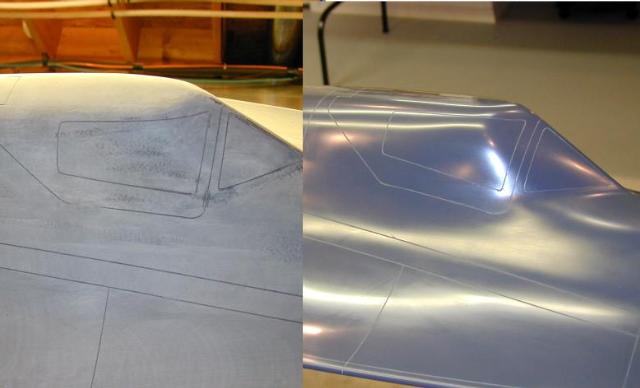
Buffing done, now comes the mold wax, Partall. Here you see the nose waxed and the back not. Once again, the smoother we get, the darker and shinier it gets.
This is an interesting example to show you several things. First, to see how much work it takes to get from rough sanding to being ready for mold making. Secondly, it is a good example of how this Duratec primer can be taken from one condition to another, by just continuing to sand it finer and finer.
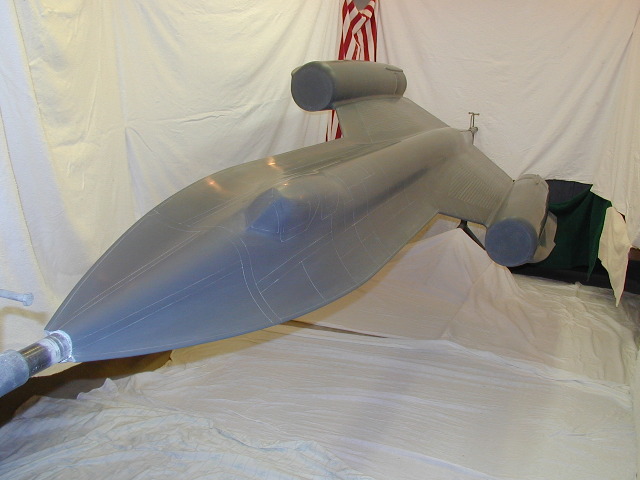
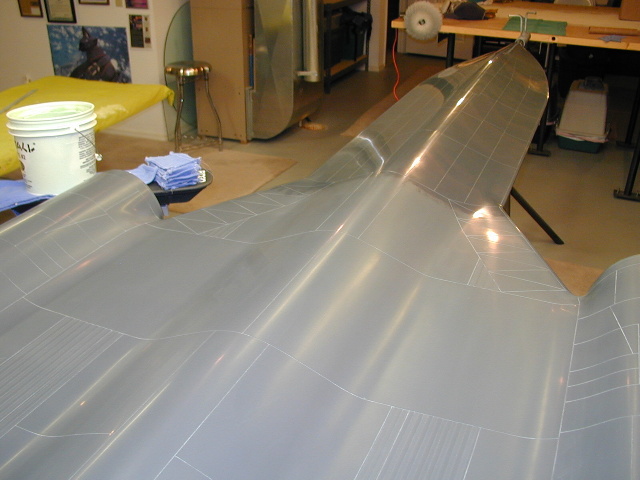
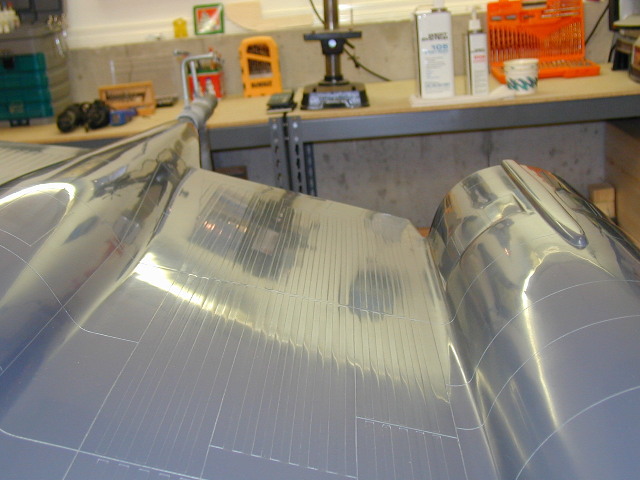
These last few shots are showing off the finished fuse plug, and how good it's looking. Here is a shot of the top rear section, showing off the parachute doors, corrugations, vertical fin anchoring base, and blow in door area.
Nice shot looking forward.

This was the best shot I had to really show how slick we've gotten this thing. Considering there's 2 years of work riding on this thing not getting stuck in the molds, you can see why I'm a bit paranoid about making it as smooth as possible.
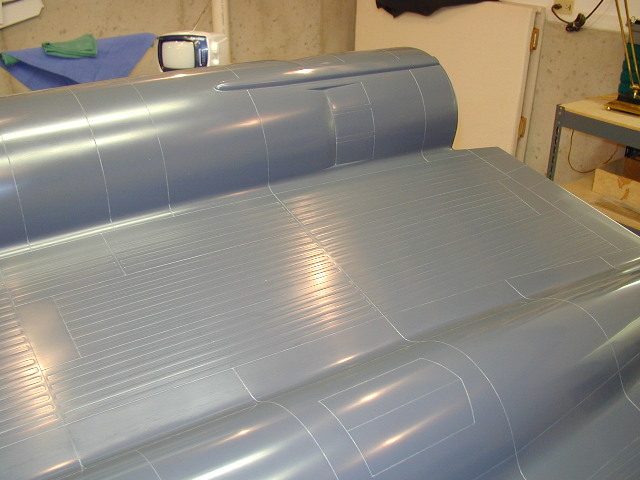
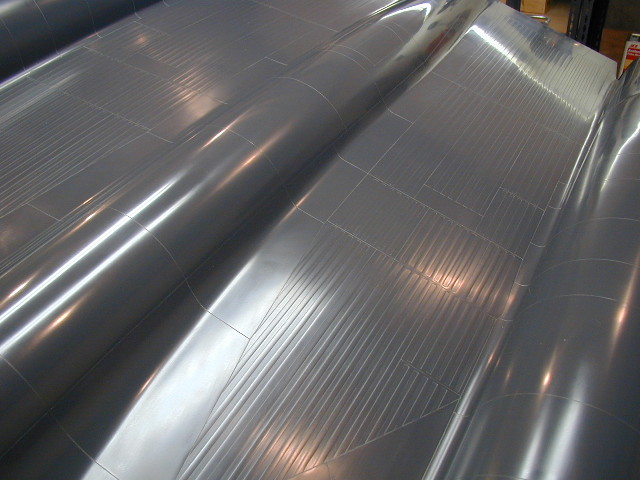
The last photo here, is a shot to highlight how well the corrugations have turned out. This is quite a distinctive feature on the full size bird, and I'm really pleased with how our representation of them looks. Rivet detail and weathering added to a plane that will be pulled from these molds should look really sharp. Next up, is starting to jig this beast up, to cast the mold off of it... Stay tuned...
Head back to the Main Page