7/15/2009
Main Landing Gear Completion
It's been another long stretch since the last update. Things have really gotten busy on the home front. Last fall, my wife left the working world and returned to school to pursue a law degree, which is no small undertaking. With 2 small boys at home (age's 3 and 5), progress in the shop has slowed, but is still moving forward. This installment shows the scale completion of the main landing gear area.
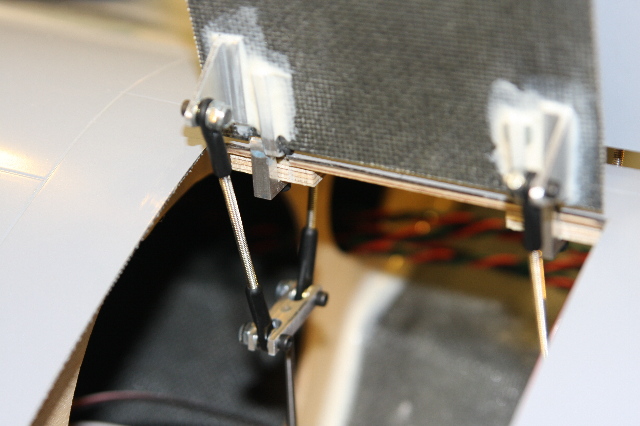
This shot shows the mechanisms for the inner main gear doors. The hinge line on these doors is really tricky and I had to machine every part of them to get them to work correctly. I've got a single cylinder on the front and one on the back, that is driving both doors at the same time. I had to make the hardware as well for all the connections to work properly. When the dust settled, they now work great.
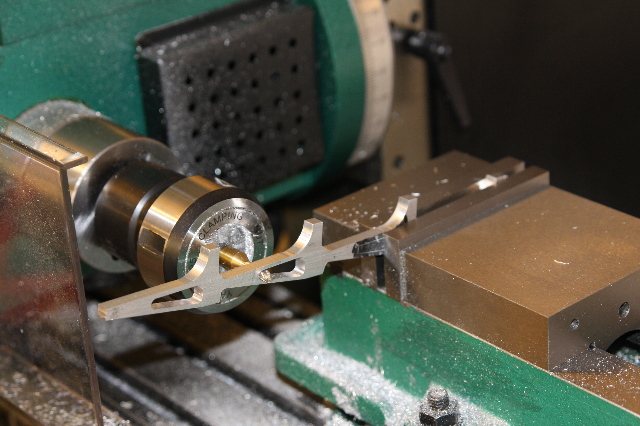
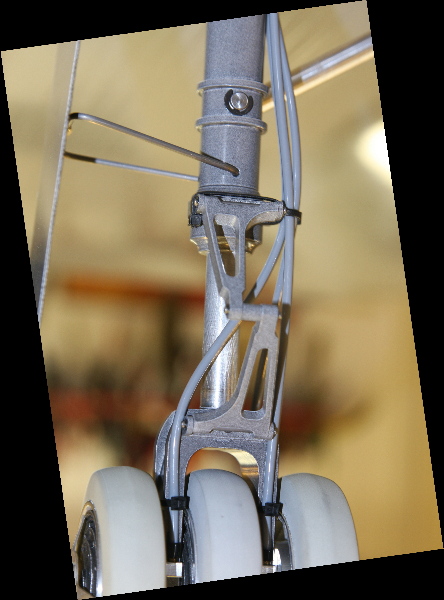
I've now come to despise scissor links. Man there is a lot of work to make these. I tried to simplify some of the cutting operations as shown here, by leaving all 4 together as long as I could, and that helped a bit. But by the time it was done, each scissor link, had 26 machining 'operations' on them. For the next ones I need to make for the nose gear, I'll probably set up the rig different than show here, but that's part of the learning process.
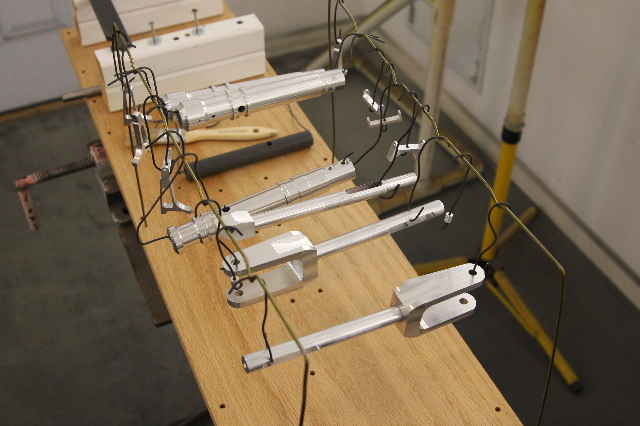
Once the gear were made, it was time for something new....powder coating. Shown here is everything getting an acetone wash to remove all the machining oils and dirt.

Once everything was clean, I let them dry in preparation of powder coating.
Here's the powder coating rig. You'll note a transformer on the ground and a gun, and a foot pedal. You push the pedal, to charge the system, and as the powder comes out of the gun, it sticks to the part, via static charge. If you screw up, you can just brush it off with a brush, and start over. The hard part is holding the part with a wire, and turning it around to evenly coat it. I was also doing this in front of the big exhaust fan, as the powder is bad for you, and you want to wear protective gear when applying it.
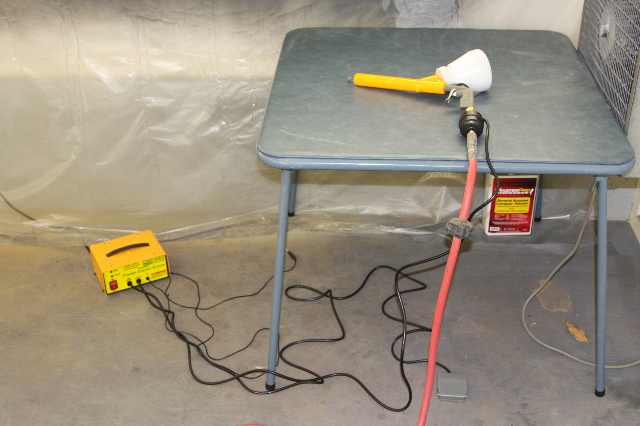
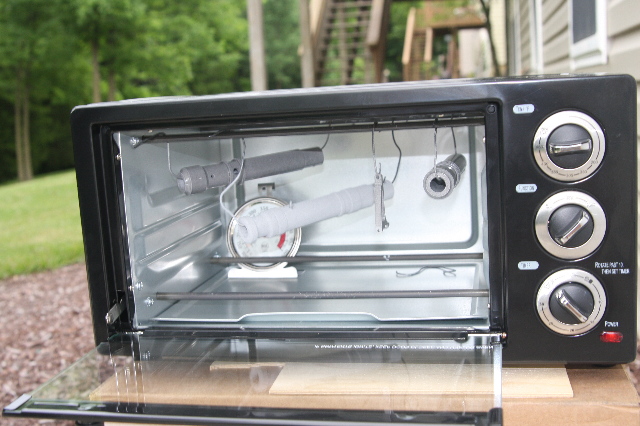
After it's coated, you bake it for 30 minutes at 400 degrees. I got a $28 toaster oven from Wal-Mart for this, as you can't use the oven for food after you use it for this. Supposedly, the gas and curing process is flammable as well, so you want to do this outdoors. Another thing you can see here, is that as it cures, the colors I was using got darker. Since I was having to hand blend my powder to get the shade of gray that I wanted, it was quite tricky to mix it way light, to account for it getting dark after baking. I practiced on several pieces of scrap prior to doing the real parts.
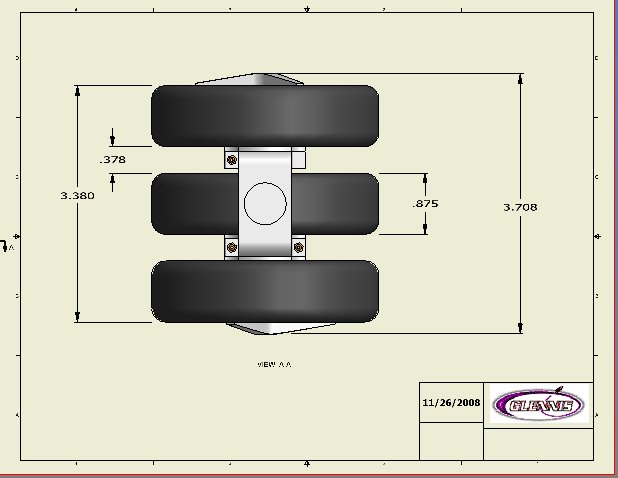
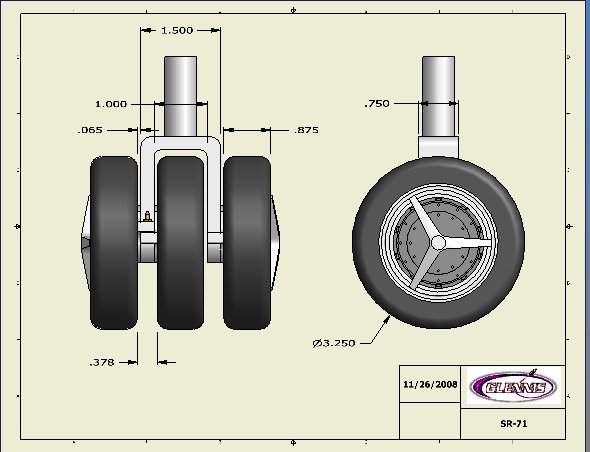
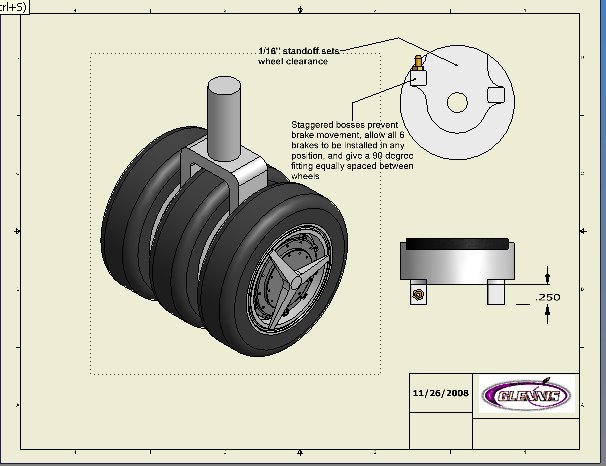
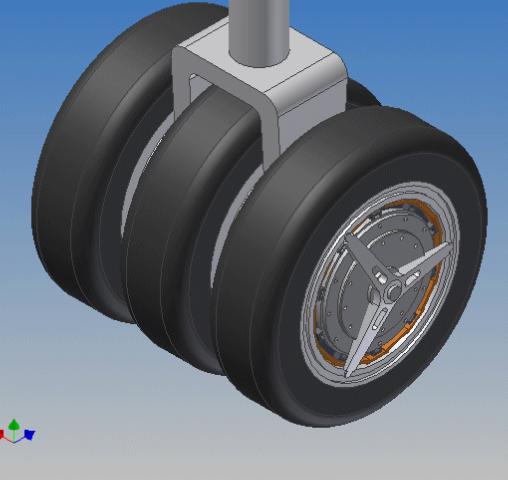
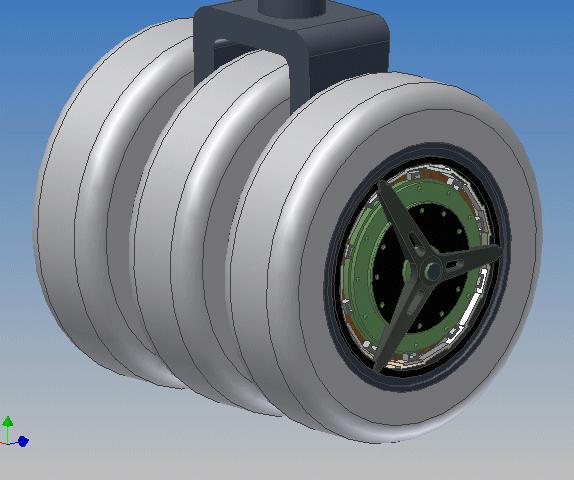
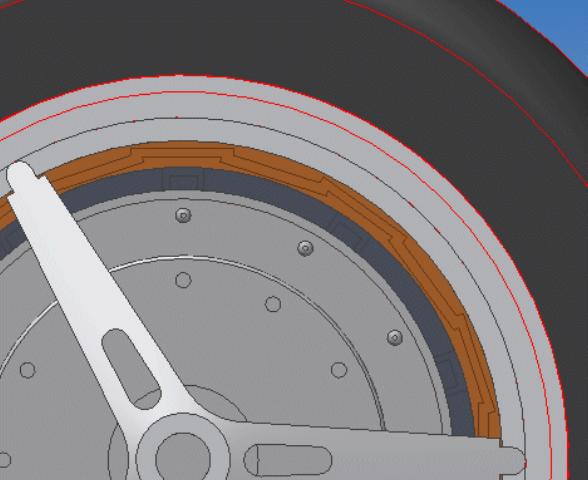
With the struts well under way, next up was wheels and brakes. For this, I turned to Dennis at Glennis Aircraft. He does excellent work, as you'll see below. Like anything, custom work like this takes time, and as long as you plan ahead for it, it's a non issue. As I got him started on the wheels and brakes, we corresponded back and forth several times, so that the struts I was making, would fit the wheels and brakes he was making. The next 3 shots are CAD designs that were part of that process, so we could confirm both of us were on the same track. If you look closely at the 3 shots, you'll also see the details of some great idea's that Dennis had on getting 3 disk brakes to work in very close quarters.
Later in the process, he got to working on the wheel hubs. Here is a CAD shot showing how the inboard hubs would look.
Here is a shot showing the outboard hubs. Both inboard and outboard rims are different, and Dennis took that into account at the design phase.
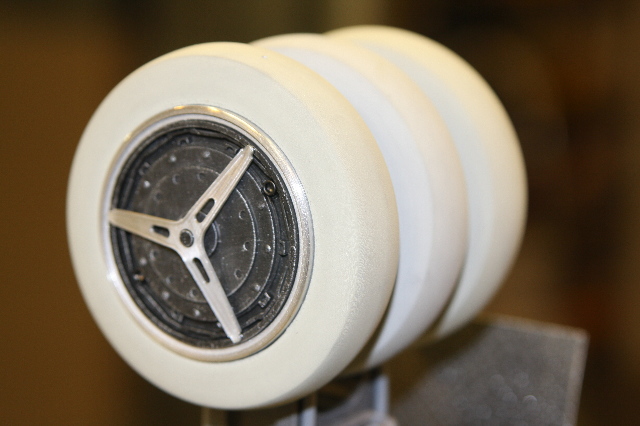
This shot is a color correct version, showing the off white nature of the main tires. Dennis went through 3 different chemical combinations to find the correct look for the rubber color. In the end, I think he hit it, spot on.
When I got this shot showing me the hub detail, a few weeks before the wheels were delivered, I thought there was no way, the actual wheel would be this detailed. I was stunned when I opened the box and it was.
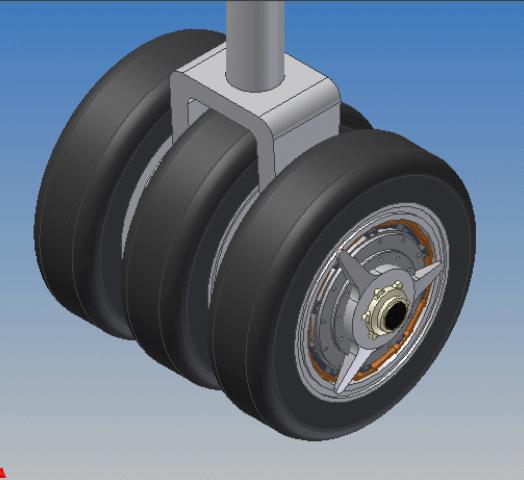
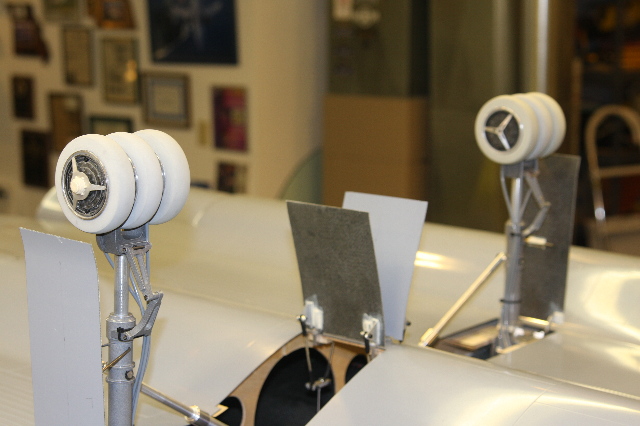
The completed wheels and struts, with brake lines, and gear doors.
Outboard wheel detail.
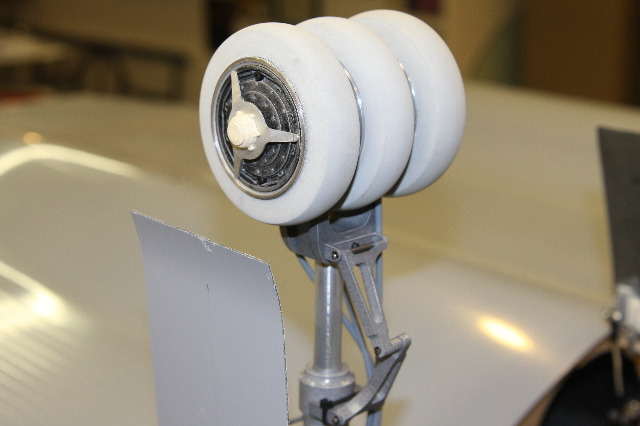
Inboard wheel detail. You'll see what I mean, when I said above, the actual wheel delivered, was on the money with the CAD work. Very impressive.
Close up, of the completed, powder coated strut and wheels. Note that the original upper struts that were just straight. I have now replaced them with scale ones. You'll also see here, and in the shot 3 above, that I've got the angled full scale struts that were used to retract the gear. This angled piece goes through some interesting angle changes as it retracts, and I've got it all working great. Overall, I think the landing gear is turning out even better than I was shooting for, and am very pleased with the results.
Head back to the Main Page